

Cutting out a background from an image is the best way of improvising your photo or any image to fit and use it for multiple applications. Because it allows you to cut out the original background and create a fun and balanced background that can easily complement the image.
However, the process might be time-consuming and daunting if you are a novice and lack the right tools. For that reason, we recommend you use Adobe Photoshop which would be your right tool for cutting out background from the image even if you are a novice.
Nonetheless, Photoshop also offers different tools you can choose to help you execute the process straightforward. They include; the Quick Selection tool, The Background Eraser tool, The Pen tool, Color Range and more.
1. Quick Selection Tool
The Quick Selection Tool is a Photoshop tool that uses AI that cuts out the background of an image by marking the edges of the foreground {subject} in real-time. To use the Quick Selection Tool to cut out the background follow the guide below:
Step 1: Start the Photoshop app
Start the Photoshop app on your PC device and then open your image file in Adobe Photoshop from the top menu by clicking “File” and then “Open”.
Step 2: Ready your Tool
From the Tools panel, select the Quick Selection Tool which is found on the left side toolbar. If you do not find it could be nestled/within the Magic Wand Tool. After opening the Quick Selection tool, at the top of your workspace, there is a menu and select “Add to selection” and open the ‘Brush Picker’. With Brush Picker, you can increase and decrease the size of the brush depending on the image’s size.
Step 3: Remove Background
Then click and drag your mouse to remove the background. When you drag your mouse around the subject the brush will automatically find edges and gradually work around your subject while marking with a group of marching ants/selection. To work on tougher areas you need to zoom in closer and reduce the size of the brush if you want to work on the smallest detail.
Step 4: Refining the Edges
After removing the original background, you remain with the subject, then zoom in on the subject, and then from the pop-up menu select ‘Refine Edge”. With Refine Edge dialogue you can easily fine-tune the subject. For the best result, first, you need to change the View Mode to ‘On White’ to help you fix edges that need the most accuracy.
Keep on switching between the modes Add and Subtract on the Options bar at the top until you fine-tune your selection. Or you can also hold down the “Alt” key to toggle the subtraction mode and release the “Alt” key to add to your selection. To soften the jagged edges of the subject simply increase the smooth value slider under ‘Adjust Edge’.
Step 5: Review your Result and Cut out
Review your result and if you are satisfied, isolate your selection from the background right-click and then click ‘Add Layer Mask’ or ‘Layer Via Copy. Then, the background will disappear instantly and will assign your selection to a new layer. Or you may press the backspace key to remove/delete the background.
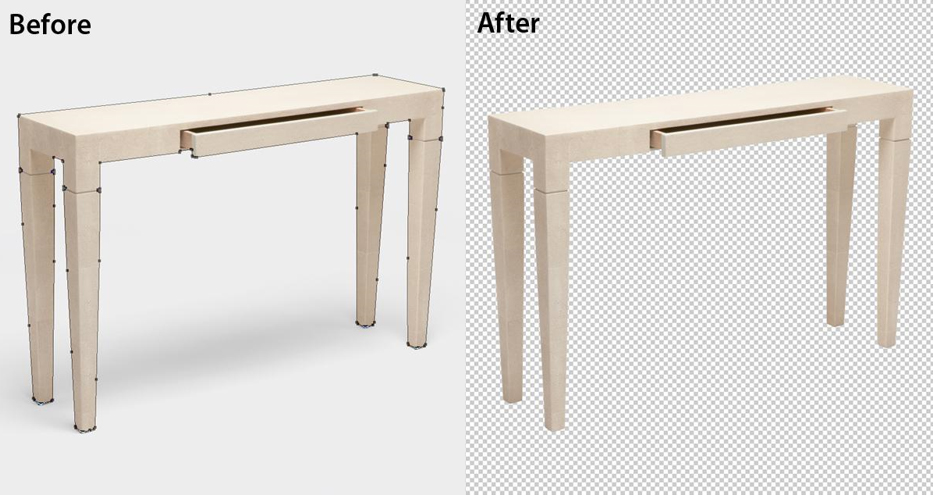
2. Clipping Path
You can also manually cut out the background from the image by using a clipping path. If you want to use the clipping path method you must use The Pen Tool in Photoshop. The Pen Tool will allow you to draw clipping paths around the selection using a combination of straight lines and flexing lines while using Control-Key to switch between the modes. Click > https://docs.google.com/document/d/1SMKqj1Lg9S4kGB_Nugkxb7IfmgoKAMGoN6gvngtQD_A/edit
Conclusion
Explore more by cutting out the background from the image for it to stand out and use it for multiple applications. With the above-mentioned methods, you can easily remove the background provided you choose the one that is efficient, convenient, and easy to execute.